Saturday, May 19, 2012

You've Come A Long Way, Baby

How does this painting


become this painting?


Lots of paint and layers, and more than a month of sitting on it. I started this painting near the tail end of the online class I was taking from Flora Bowley. I started a few paintings following her step-by-step instructions. That's an ironic undertaking, and I'll explain why.

Flora has written a new book titled Brave Intuitive Painting.  Her style is to get many layers of paint on the canvas, using fluid acrylics, sprayed water to let it flow, and many tools like sponge brushes, stampers, and her fingers. Eventually, she'll look at the painting and begin to see some shapes and designs emerge. It's what I've heard other artists call letting the painting tell you what it's going to be. Intuitively, you will know where to go next with the painting.

Now here comes the ironic part. When I take a class, even art classes, I always try to follow exactly what the instructor is saying. I do their steps as they are given to me. So really, there's nothing intuitive about that. You're just following directions. But I agree with that approach, especially when you are learning. I also preach that approach when I'm talking to others about cooking. I say, always follow the recipe exactly as it is stated the first time you make the recipe. After you've made it once, and tasted it, you can then modify the recipe any way you'd like. I feel that if you don't do it the written way once, you'll never know how it is "supposed" to be. The same is true with taking a painting class. Recognize that the instructor is an expert, and she's made hundreds of paintings using these techniques. If she says to put your cool colors together, then hey, give it a try. Surprise! She's right. You try to sneak in a warm color when your acrylics are still wet, and you'll be making yourself some mud.


This is another stage of my painting. At this point, I wasn't seeing anything yet. It looked disjointed, so I decided to add some sketchy lines that could unify all sections of the painting.


I then added a lot more color, so much so that it looked very busy. I don't have a photo of it at this stage. That's when I put it down for a month or so. During that time, I had finished Flora's class, and finished two of the main paintings I started for her class. Putting it away allowed me to come back to it and really allow the intuitive part to kick in. I was done with the class, and no longer following her procedures step by step. I was separated from the daily tasks and could now just use everything I had learned, plus, the feelings that came from inside of me.

I'll show you the final painting one more time. Look at the darker bits, like the bright blue and magenta, but look at how I unified the whole piece with the creamy yellow. I call this piece "Forest for the Trees." I thought of that name as I was thinking about how many layers are in here, and how many colors and objects are there that you can't fully see anymore.


This piece was acceped into the Lighthouse Art Center show called "Art of Association." It will be on display June 1.


Tuesday, May 15, 2012

Spring is in the Air

Our latest Artist Trading Card swap was a couple weeks ago. We chose the theme "Spring," and interpreted that a few ways. But before I show you the cards, let me make clear to you that the swap is really an excuse to get together with friends socially. We choose a restaurant, have dinner, and make a night of it. The cards are always at the end after we've eaten and all the plates are cleared. We lingered long after the swap, even talking more in the parking lot. We do this a few times a year, and it's always loads of fun. Now here are the cards:

A while back, I made some painted tissue paper, and I now have a stash that I pull out for various projects. I used card stock for the card base, then cut a square of the painted paper to glue on the front. I added a spring-like saying (I made up different sayings based on what I "saw" in the painted paper), and I attached ribbon for embellishment.


These are painted flowers that were then cut so they could pull out like springs. Very clever.


This artist took photographs of bouquets of flowers. Then she mounted them on the cards and painted beautiful borders with nice sentiments.


These are hand-pressed flowers from her garden.


And this woman made beautiful watercolor cards.


I hope you can see in these photos that the stems of these flowers are wire springs.


These beautiful colors were made by encaustic wax painting.


This artist painted on one big sheet, then cut them into cards later.


We all took one card from each group home. Our theme for the next swap is "Fashion Statement." Any ideas?

Friday, March 2, 2012

The Process of Another Painting

As I continue through my painting course with Flora Bowley, I'll show you other paintings I'm creating, and the steps I've taken along the way. I've got 9 paintings going, and here is one more.


Done yet? Not quite.

Thursday, March 1, 2012

The Process of a Painting

I'm currently taking an online painting class with Flora Bowley. I've really admired her style of painting and you can see it here. I've taken an online painting class before and it was a big fail. Basically it was a link to 24 instructional videos, but there was no text or comments from the instructor. No feedback whatsoever. Flora has obviously taken a lot of time to convert her process into a step by step method. All of us students are doing 1 layer of paint on a canvas, learning another technique and doing another layer, then another, and so on. The idea of the class is to create 2 canvases over the length of the course. Well, I'm too impatient to wait for her next lesson, so I just keep starting new canvases. I have nine going right now. I'll show you more later, but for now, I'll show you one canvas as it has evolved over the weeks.

The first layer is just to get some paint on the canvas. This was done by dripping the paint on, spraying a water mist on it, and smearing it around. We were told to just use warm colors, so we wouldn't mix wet warm with wet cool and get a muddy color.


After that was dry, we added cool colors.


Then I started added color with abandon, losing a lot of what I had done.


I added a little black and white, but not much.


I painted, sprayed, and let some paint drip down.


I added a few images.


And then tried to define them.


I really don't think this painting is done yet. What do you think? Should I have stopped sooner?

I'll post more paintings in process later this week. Tomorrow's painting shows how I tried to try something different, and not do flower buds and pods like Flora often does. My intent is to eventually find my own style. Well, we'll see.

Tuesday, February 28, 2012

What's an ATC?

For many of you artists out there, you know exactly what it is.

ATC stands for Artist Trading Card. I don't know who invented it, but I'm guessing it was a very generous artist. You see, Artist Trading Cards are small works of art, 2 1/2" x 3 1/2" (the size of a playing card). The idea is to make a small piece of art and trade it with another artist. No money changes hands. You are giving your art to another, but then you are getting one of theirs in return.


Sometimes they are traded in organized swaps. If a dozen artists say they're going to trade, then you need to make a dozen ATCs to have to trade.


Sometimes you trade in person, and sometimes you trade through the mail. You may not ever meet the artist, but it sure is fun when you receive that package in the mail and you know it's someone's wonderful art. An artist may choose to be a host or hostess of a swap. Usually that means that all of the ATCs will be mailed to her home. She then splits them up so everyone gets one of each, and mails them back to each artist with the postage they have provided. At the Wellington Art Society, we go out to dinner together to swap. We get an idea of how many people are coming, and then we email everyone so they know how many to make. There are about 20 of us in the group who make ATCs, and 8-12 will participate in any given swap. Our latest swap/dinner was held at I'm Greek Today in Royal Palm Beach.


We choose a theme for our swaps. This time, the theme was Dreams.


Sometimes ATCs are interactive. They have some movement, an insert, a puzzle. This next one shows someone dreaming of inner peace.


This one uses a song lyric as inspiration. Who can remember The Eurhythmics singing "Sweet Dreams are Made of This" back in the 80's? I brought it forward to this decade and crafted the latest trendy treat, a cupcake.


This artist looked into the meanings of dreams. That generated a lively conversation over dinner.


Who hasn't at one time dreamed of flying?


We haven't picked the theme for our next dinner yet. Do you have any suggestions?

Sunday, February 26, 2012

Plein Air Painting

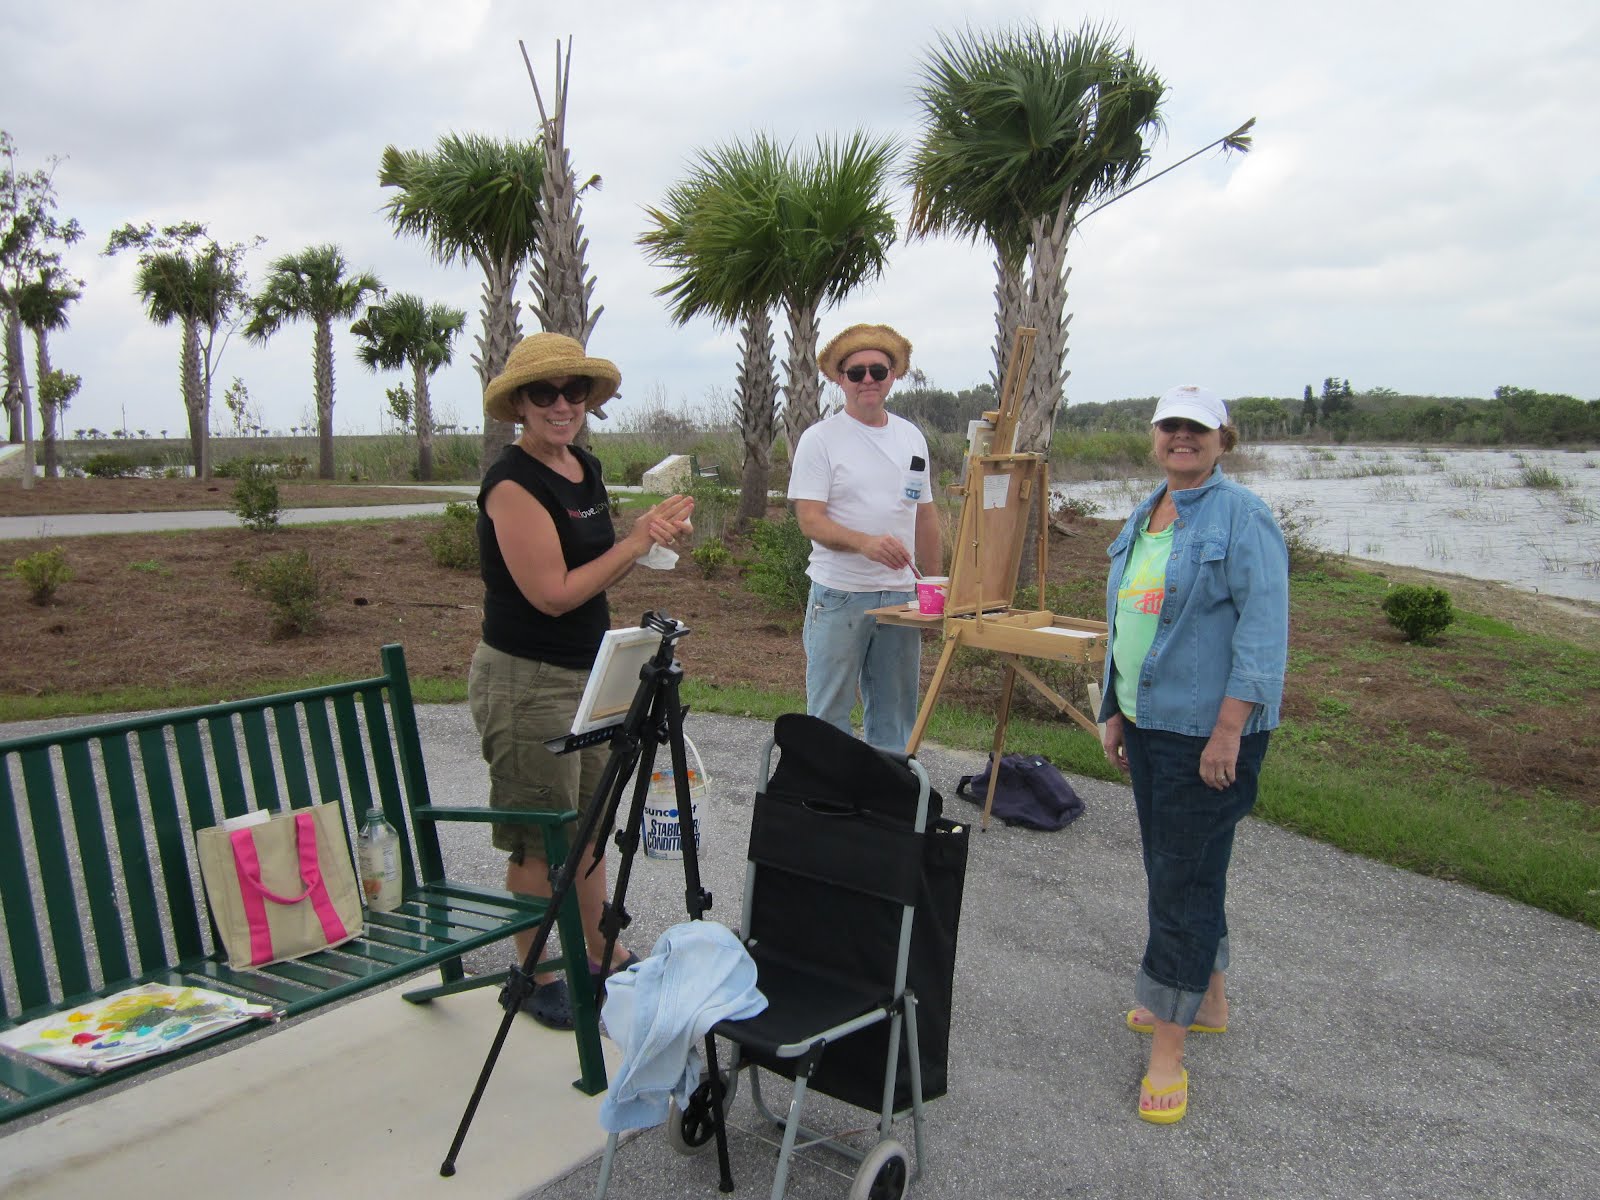
We seemed to have skipped our Winter here in Florida. Day after day it's sunny and mild. What's an adventurous artist to do? Go outside with your paints and do a little plein air painting. Plein air is simply a French term that means art outdoors. We're lucky enough to have preserves tucked in every area in Palm Beach County. In September last year, the City of Wellington opened up the Wellington Environmental Preserve at the Marjory Stoneman Douglas Everglades Habitat. Now, that's a mouthful. Consequently, everyone just calls it Section 24, which is what it was called for decades when it was an undeveloped piece of land on the west side of Wellington.

Four of us brought our chairs, easels or tables, paints, brushes, and canvases, and set out to paint what we saw. We are trained painters, not-so-trained painters, acrylic painters, and a watercolorist.


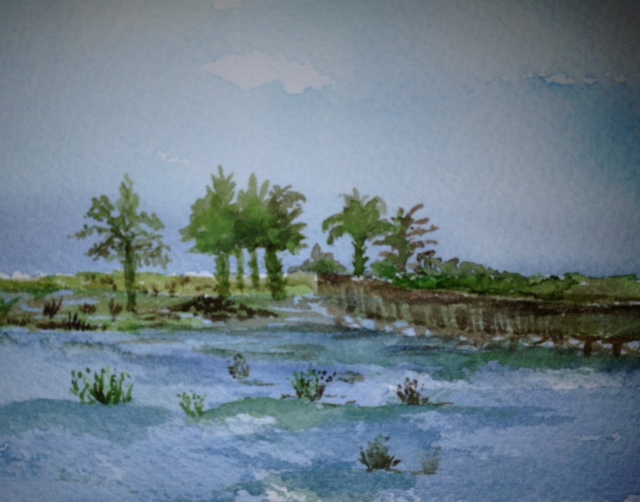
As you can see, we all came up with different paintings, yet we were all looking at the same view. I'm glad we didn't have the same results!

Tony created this with acrylics.


I also used acrylics, and infused some brighter colors to exaggerate what I was seeing.


Bobbin used watercolors.


Linda painted with acrylics, mostly using her palette knife.


If you'd like to visit Section 24 for your own plain air painting, photography, birdwatching or hiking, you can find it by traveling west on Southern Blvd. After the Binks Forest traffic light, continue west to your first left. Take that left, which is Flying Cow Road. Travel 3 1/2 miles south to the northern entrance of the preserve. There is also a southern entrance, but there are no restroom facilities there. It is a .8 mile walk over two boardwalks to the trellis area where we pitched our chairs and easels. For a 1 mile walk, you can visit and climb the observation tower. Since this area was reclaimed, it needs time for the planted trees to grow. It is already populated by quite a few species of birds.

Wednesday, February 22, 2012

Inspired by: Jill Berry

I recently purchased Jill Berry's book called Personal Geographies. Jill creates art that is like a map of her experiences. She uses different style maps, creating them completely from scratch or altering photos using Photoshop. Each map tells a story about some part of her life.

I became interested in her art when I stumbled on her blog. She's generous with her experience, often posting directions to artwork she has created. She posted a little tutorial about making a cover for a book, and inserting two signatures of pages for the book. She did a simple painting on the cover of beach dunes and the sky. Well, being quite the beach girl myself, this caught my eye, and I knew I had to make my very own beach book.

Here is the painted cover and some closeups.


You take the mid-point of the cover and fold that in half. Then re-open it. Take the mid-point of each half and fold those in half. They create the front and back covers, and they are now two-sided covers, instead of the inside being white.


I folded paper to make two 5-sheet signatures. Five sheets folded in half make 20 pages, so this is a 40-page book.


The signatures are stitched in. I used embroidery floss, but I think next time I'll use waxed thread. I had trouble with the threads coming apart and stitching through the middle of one. I also didn't quite understand how to put two signatures in, so I struggled, and made up my own technique.


While I was at it, I painted another cover, that is ready to become a book.


I realize this wasn't really a Jill Berry map project, but that will be my next adventure. If you'd like to read Jill's blog that is devoted to maps, you can see it here.